Average Reviews:

(More customer reviews)What a TREAT this dipper is! We've used it for the first time today and already have so many other ideas to experiment with.
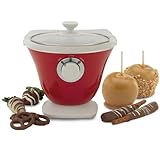
For starters, the 'set' consists of a burner 'pot' in a footed bowl. I was worried that perhaps since I have younger children and the bowl being wider at the top that it maybe top heavy but it's actually sturdy and doesn't wobble which is important to me. It has a very easy to use, large dial to turn the device: OFF, LOW or HIGH. It comes with a ceramic fluted inner bowl that you melt your food into and a glass top with a knob to hold onto and 2 dipper forks that look like mini forked ladles. The cord used to plug the device into is fairly short so unless you use some sort of extension cord, you'll have to find a sturdy surface to place the Gourmet Treat Dipper right by an outlet. Personally I like this feature so that there are less chances of one tripping on a cord if left dangling. We used it on our kitchen island that has an outlet and placed the Dipper in the middle of the island.
The directions have mentioned in at least 2 places to NOT allow ANY water at all in the chocolate so we were really careful to dry the lid, pot and any utensils and foods we had planned to use.
We first tried melting chocolate chips. Since the directions state that it takes approximately 40 minutes to melt a bag of chocolate chips or 1 bar of chocolate, we used 8 oz of semi-sweet chocolate chips. We washed & dried our strawberries and had these mini chocolate chip cookies we wanted to try as well. Since I have had issues in the past melting chocolate on the stove and having it burn frequently, I decided to test out the higher heat and see if I could detect ANY chocolate burning at all and I couldn't - even with a small amount of chocolate in the bowl (8oz of chocolate chips melted to about 1/4 capacity in the bowl). I was pleasantly surprised that some of the chips started to melt after 5 minutes. After about 25 minutes, with some stirring every now and then, our we had nice, thick melted chocolate.
It may be because we are inexperienced with them but so far, the dipping forks are a bit awkward for us to use. We found that dipping the strawberries by hand while holding onto the green stems / leaves are best which is not much for the little ones because they had to simply stand by and watch since the white ceramic bowl AND the red, heating bowl tend to get very hot.
Next came the mini chocolate chip cookies. The boys were able to lower the cookies in the chocolate just fine but since the chocolate was fairly thick, they struggled in trying to 'drown' their cookies in the chocolate since the cookie tended to stay on top of the melted chocolate so we dumped the cookie in the bowl and had to push the cookie in the chocolate in order to cover it up then scoop it up with the dipper fork (it did come in handy for this!) and we dumped it on a plate covered with parchment paper.
On our second round, we added 1/2 tsp of coconut oil to the chocolate and it turned out to me MUCH smoother in consistency and was easier to 'dunk' the cookies into. The instruction pamphlet does mention that if you are going to add anything to dilute the chocolate, to not add anything but vegetable oil (no water or milk) or you will ruin your batch of chocolate.
After our chocolate experiment, we rinsed the bowl out (with hot water since our bowl was hot...we didn't want to wash it w/ cold before it cooled down and risk it cracking due to varying extreme temperatures) we then melted 5 caramel sheets (the instructions suggest 1 bag of caramel candies). These took a bit longer to fully melt, even with stirring encouraged because the middle tended to glob together. We started out with HIGH heat then I noticed that some of the melted caramel started to darken on the sides (slightly burned color) so we kept the temperature at LOW for the caramel until we finished. It took about 35-40 minutes to fully melt the caramel at LOW temperature, the book stated it would take this long so no surprised there. We then stuck popsicle sticks in our apples and sumberged them in the melting pot, pulled them out and smoothed over some areas that had excess caramel wtih another wooden stick and placed them in mason jars so they would dry without touching anything.
After we dipped a couple of apples, I wanted to see if the caramel would in fact burn at high heat...I could have missed it, but I didn't read anywhere in the instruction manual about NOT turning caramel specifically at high heat (it does state that some candy will burn at high heat but it does not state any specific foods). Sure enough after 20 minutes, half of our caramel burned and stuck to the ceramic sides.
I see endless possibilities with this little thing! There are chocolate stores in the mall that sell candy coated apples for $8-$14!! We could do our own at home and give them for gifts from $1-$3.00!! You could do one layer in caramel, coat it with crushed nuts, allow it to dry then do a second layer in chocolate with crushed toffee, wrap it and give it away as a really nice gift.
I happen to have a bag of these chocolate chips when I made some items for my son's school but we generally don't eat a lot of sweets...I make my own 'no sugar' chocolate from: raw cocoa powder, raw cacao butter and powdered lakanto or stevia...I'll be trying a version using the powdered Body Ecology powdered Lakanto and dip some healthier foods in it to experiment with some healthier options.
What I love about this little thing is that it's nice in appearance, it's VERY easy to clean, and most of all that it can be used for different foods - NOT just candy! You can use it for melted cheese / queso, other warm / hot dips from veggie dips to chili.
If I can make a suggestion to the manufacturer...I'd ask that they create a ceramic bowl with a SMIDGE deeper groove so that it's more seated and has less of a chance of sliding off should someone move it from one area to another. We kept it stationary so we didn't have any issues but I could see how the lid COULD slide off if being moved and someone weren't careful.
I would highly suggest this item - just test out the food at the LOW temp FIRST or just not leave your foods at the HIGH temp unattended to avoid burning your foods. Don't let the high temp issue deter you...we melted the chocolate on high and kept it at high with no issues at all. I think this would make a GREAT gift that you can use for anywhere from 2 people for an intimate setting to an entire large family gathering. I plan to use this for Thanksgiving, Christmas and Valentine's Day! I CANNOT verbally express HOW DELICIOUS the chocolate covered strawberries are!!! YUMMY!!
Click Here to see more reviews about: Back to Basics PC17581 Gourmet Treat Dipper, Red
Enjoy gourmet treats without leaving you house!The gourmet treat dipper is a fun easy-to-use appliance for making gourmet candy-dipped apples, pretzels and fruit at home
 Get 29% OFF
Click here for more information about Back to Basics PC17581 Gourmet Treat Dipper, Red
No comments:
Post a Comment